Gambler Boss
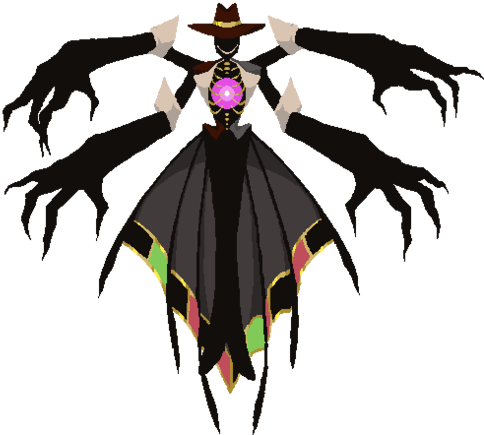
Gambler Boss
When it appears
- On the field the moment the Moon map loads.
- Not the named boss of any region. On a map the spawner has no boss picked for (Moon) the 600 second boss step takes one of its 7 boss slots at random, and this is one of them. One of the slots is empty, and a roll on it brings no boss.
Numbers
| Health | 20000 |
| Move speed | 1 |
| Push resistance | 5 |
| Damage reduction | 1 |
| Damage amplification | 1 |
| Loot chance | 0% |
| Experience given | 99999999 |
| Damage threshold | 5 |
- Push resistance 5: a hit slows it far less than it slows a normal monster, and it is back to full speed 5 times sooner.
- Loot chance does not apply to a boss. A boss drops its own reward when the fight ends, not on this roll.
- Experience given also rises with the run's monster strength, by the same multiplier as its health.
- Damage threshold 5: inside the Magus Circle mansion only, every 5 damage it takes shakes an extra pickup loose. It does nothing in the four regions.
What its tier means
- Boss. Runs a scripted fight of its own instead of joining the wave. Stun, freeze, chill, polymorph and knockback do not stick to it, and touching it costs the same as touching an elite.
- Elite. The tough version. It is the only kind that rolls for a chest when it dies, the run's damage bonus against elites is what applies to it, and elite crit chance and elite crit damage are added on top of the normal ones. Touching it costs more than touching a common monster. Run stats: Damage against Elites, Crit Chance against Elites, Crit Damage against Elites.
Attacks
Contact
Touching it costs you one point of health, plus whatever the run's Heavy Hitters bonus adds, because it is a boss. A monster that is frozen, stunned or polymorphed cannot hurt you by contact.
Immunities and behaviour
No immunities and no special movement behaviour.
Phases
It does not have one health bar, it has several. Every time the bar in front empties it drops loot, moves to the next one and changes its pattern: every other step adds a card toss pair, more fan shots, more after images, a bigger tide toss, more clones, faster shots, a shorter gap between attacks and a wider reach, while the steps between those trade some of it back.
| Health bars | 8 |
| Loot dropped | once per bar, 8 times over the fight |
| Seconds between attacks, first bar | 5 |
| Seconds between its second attack, first bar | 10 |
Attack pattern
| Fight pattern | Gambler |
| Projectile speed | 2 |
| Projectiles in a fan | 3 |
| Card toss pairs | 3 |
| Walk speed | 1 |
| Turn speed | 1 |
| Health bars | 8 |
How its health scales
In Mirna: the run's monster strength starts at 1 and moves +0.5 every 300 s; +0.25 every 150 s; +0.1 every 120 s; +0.1 every 60 s; +0.1 on reaching stage 3 of the roster; +0.25 on reaching stage 4 of the roster; x5 on reaching stage 5 of the roster.
In Yawm, Elysia, Yomori: the run's monster strength starts at 1 and moves +0.5 every 300 s; +0.25 every 150 s; +0.1 every 120 s; +0.1 every 60 s; x5 on reaching stage 4 of the roster.
Where two of these steps land on the same second, only one of them fires: the region's own page shows which.
In Mirna, the first boss fight also adds 20, as long as the first death scene has not played and you have died fewer than 2 times.
Once the multiplier is above 1, this enemy spawns with its base health multiplied by it: 20000 health at 1, and a multiplier of 2 makes it 40000, 5 makes it 100000. The experience it gives is multiplied the same way.
Other things change this monster on top of that. Hard mode gives it 2 times its health and 1.25 times its speed. The energized run modifier gives every monster 1.25 times its speed. While you are extracting, every monster moves 1.15 times as fast. Each time a region's roster runs past its last stage, every monster except bosses gets +0.25 to its speed multiplier, up to 2 times its speed.